
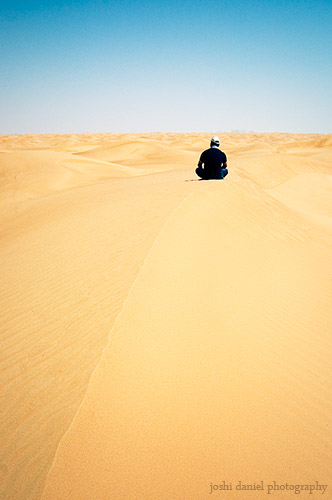
A nice image of vastness and the insignificance of a single person and their connection to the vastness of the universe.
Monthly Archives: April 2014
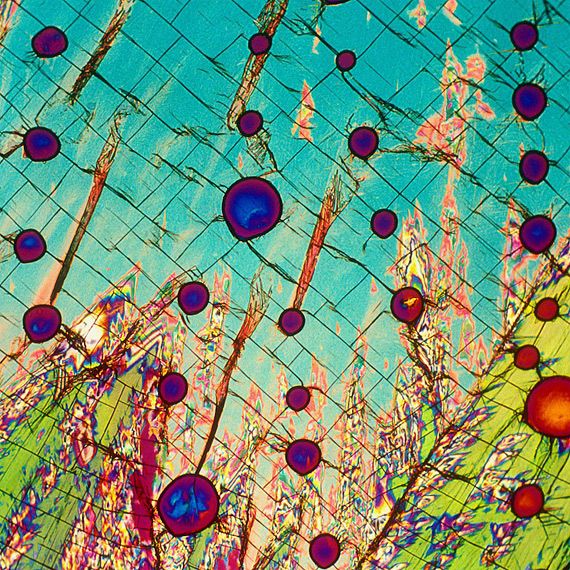
I was looking up more microscope photography for a new body of monotype work, and came across these:
Eckhard Völcker – Exploring the Microscopic World


More here
I also really dig this photo of microscopic soy sauce

via the blaze
And these: Microscopic Images of Alcoholic Drinks
via insanetwist
Vodka
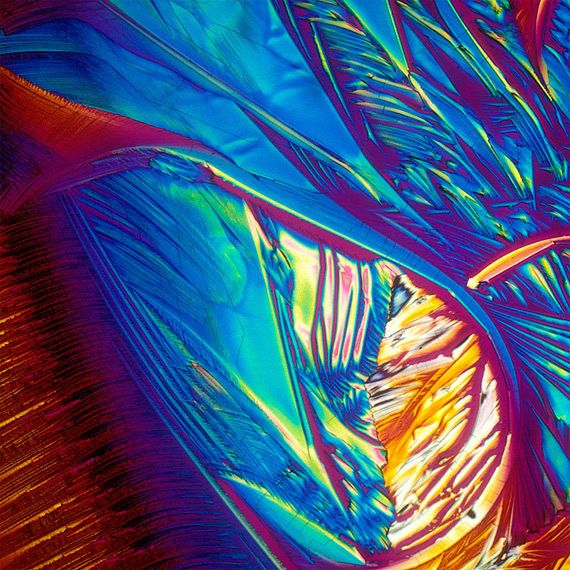
Red Wine
Li Hongbo’s flexible paper sculptures


The above photos by photographer Michael John Grist (website) during his haikyo trip to Nara Dreamland, an abandoned amusement park in Japan. Haikyo (Japanese for “ruins”) is the hobby of urban exploration, which often includes trips to abandoned places and nearly always includes people photographing their experiences.
I was particularly drawn to these images because they were at once formally beautiful, but also emotionally evocative. They are haunting images of a constructed reality that was enjoyed, then abandoned. I saw these awhile back, but I was recently reminded of them when I was trying to think of other artists that work in capturing constructed realities.
Painting Blog
Dear friends, sometimes I get carried away into the artistic arenas of decorating and just beautiful things I see in every day life. That is one of the points of this blog: to catalog what inspires me. But my outlet is painting, and painting is what the things I see inspire me to DO. So here’s a little process for you.

Find pictures of butterlies on internet. Doodle some butteflies in sketchbook. My butterfly will definitely be blue, I decide.

Ooh, here’s some pretty paints. Never mind that two are acrylic and one is watercolor. The watercolor may not be strongly pigmented enough to compete, but they’re all water based so it won’t hurt anything. I told you we’re a mixed media family.
 I notice my watercolor pan lid sitting out, so it becomes my mixing tray. I think a lot of people think artists are really precise like…
View original post 272 more words
Photo tiles

Crunchy Betty has this great tutorial about making picture tiles. It uses mod podge, so it’s not archival, but they look really nice. There is a tutorial here, including how to hang them. Tutorial includes pictures.
Printmaking: Artists working in Etching
Kenji Ushiku, born 1922. Japanese.

HANA-12-L, ETCHING, 13 X 10
(found here)

(found here)
Megan Corbett
(website)

Megan Corbett has created a series of etchings printed on hand made paper and fired clay. The artists’ inspiration evolved from collecting sea weathered china fragments found on beaches around Northland, New Zealand. The collecting of these pieces has become something of a treasure hunt for Megan and she has researched this topic for some years.
The artist has recreated designs from found china fragments onto her own ceramic pieces and zinc etching plates. The purpose of the work is to draw attention to ceramic sherds as an historical fragment of New Zealand’s colonial history.

Madeline Adams
O,R,1,2,4,6,7,9 – AP, 2006
Etching/Drypoint, 9 x 14″, page: 11 x 15″

Bl,G,5,7,a, 2008
Etching/Drypoint, 4 x 9″
This isn’t an etching, it’s sharpie on paper, but I really like it:

Layers, 2005
Sharpie on paper, 15 x 22″
I don’t know if this actually is an etching, but it looks like one. It’s the album cover for the band Mountains in their album “Etchings”.

How to stack images
This tutorial would not be possible without the wonderful guide made by Lincoln Harrison that can be found here. My guide is adapted from his with my own experiences and notes. Please see his for visuals and further guidance.
Things to keep in mind:
- Do not work from an external drive when using this process. You will need to copy your files to the hard drive of the computer you are using, then save the files back to the external drive when you are finished. This is critical to keep photoshop from freezing or hanging during the process.
- This is an extremely RAM heavy process. Harrison’s mention of watching the efficiency of photoshop helped me keep track of when I might need to restart because I was coming close to using the scratch disc, which is something you don’t want to do.
- You can not save these images as a .psd. Photoshop will freeze and you will lose all your hard work. Travis taught me that using a photoshop large document file instead is the way to go. Harrison also says that when working with even more layers than I was, flattening before importing more images can be extremely helpful. I worked with anywhere from 9-40ish individual photographs per image, though, and Harrison works with hundreds.
Step 1: Select all of your photographs that you want to combine into one image in bridge. You do this by selecting the first image, holding down shift, and then selecting the last image. Then open them in camera raw by right clicking and selecting open in camera raw.

Step 2: You want to make all of your edits on a global scale here, so hit that select all button on the top of camera raw, and then make any adjustments that you need to make. I generally adjust exposure and contrast here. When working on Dysphoria, I also increased my blacks and shadows. If you forget to hit select all before you start, that’s okay, because you can just select all the images after you’re done and hit “synchronize.” A box will pop up asking you which changes you want to apply to all of your images, and then it will apply those changes to all of your images. When you’re done, hit done. DO NOT CLICK “open image”.

Step 3: With all of your images still selected in bridge (reselect them if you unselected them), go to the menu bar at the top of photoshop and under tools, select Photoshop, and then select “load files into photoshop layers”. This is the most time consuming part of the process. Depending on how many images you have, you might want to go make a sandwich while you wait or something.

Step 4: Now go over to the layers toolbar (usually on the right, but it depends on how you have your workspace set up) and select all of your images. You do this by selecting the first one, holding shift and then selecting the last one, just like you did in bridge. Now that you have all the layers selected, you’re going to go into that drop down menu in the layers section that allows you to select blending options. Select lighten. Since you have all the layers selected, it will apply this lighten blending effect to all of your layers.

Step 6: This is when you see the magic happen. You can click on or off certain layers to decide which elements you’d like to keep in your image – for instance, in Dysphoria, if there was a hand I didn’t want, I could click through the various images and remove the offending layer. You can also choose to edit out certain elements in each layer – if I liked the rest of the image with that layer in, I could just paint out the layer that included the hand. If you’re doing actual star trail photos, head on over to Harrison’s site to check out some little tidbits like removing airplane trails that might be important to you now.
Step 7: Flatten your image and save as your preferred file type. If you’re printing, just prep for printing as normal.
Web links and resources used in the making of this tutorial:
- Lincoln Harrison’s guide to image stacking
- Astrophotography: Star Photo Stacking by PKM (instructable)
- Ben Canales how-to, photographer’s website
- Six standout night photography tips (featuring the work of Grant Kaye
Previous posts that I’ve put up about image stacking can be found here and here.
